As the last post showed we are gearing up for the final stage of the bus build: the furniture. It’s exciting and a little sad. It means that the 3 months we’d planned to build is almost at an end and we have to confront the idea of entering back into the world of work (Deirdre’s got an interview this week and I’m applying for a tipshop job.) But as Deirdre keeps saying it needs to be sustainable and for that to happen we need some form of income to be able to afford the kitchen garden, food forest, yoga studio/work studio and ultimately the house that we desire.
The final stage also means that we have to be precise with our cuts and designs. We both want a crisp clean finish for the bus. Something that stands out and does justice to the lightness of the floor and the walls. It’s going to be a challenge for our skills and our knowledge but something that we are probably more prepared for than we were 2 months ago when we begun pulling down that metal railing. In that light what follows is the first of two furniture posts. This one is of our first piece: the bed!
The bed
When planning the bus, all those months ago in Mount Barnett, we were adamant that the bed had to have a dual purpose. A place to sleep and somewhere to store our clothes and the like (storage being something of a premium in the bus). In researching Deirdre found Ana White’s website and her design for a full size storage bed. We printed out the design and have kept it with us on hand, if interested you can print it here: Ana White – Full Size Storage Bed – 2014-08-27
The first port of call was to head down to the local hardware and collect the timber. The design dimension were all American making our work a little more difficult. After some help through online conversion we settled on purchasing 2 bits of 17 x 1200 x 2400 plywood. (The design stipulates pine but unable to get the pine boards we went with the easiest option of plywood.)
First thing to do was to cut the plywood down to 305 mm ( 12 inches) wide strips. These strips would then be cut down to the required lengths for the side and end cubby’s. Using the circular saw Deirdre proceeding to cut 3 lengths of wood from each of the plywood sheet.
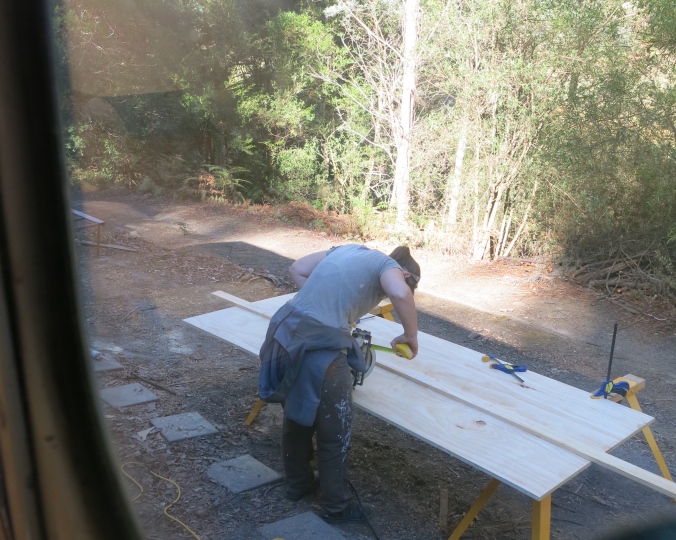
Deirdre measuring (twice!) the wood for the bed cubby’s. The circular saw is on hand ready to rip the wood down to length.
After cutting the timber into the required width, Deirdre then set about cutting each of the lengths of timber for the cubby’s. As the design shows the bed is made of three or cubby’s (or bookcases). Two on the side are the same length and one on the end is a little shorter. The great thing about having the plan on hand was that we were able to measure straight from the plan without any need to fit around wall frames and steel beams. It made for quick work and fairly soon we all the pieces cut.

The cubby’s lengths all cut to size. On the left is the end cubby, followed be the 3 dividers, one of the side cubby’s and the ends of the cubby’s.
Once the timber had been cut to length it was time to begin assembling the bed. This would be the moment of truth in which we would see how good our cutting and measuring was. To assemble the cubby’s we needed a top, a bottom, two ends and a divider. To do this was a two stage process.
First we had to make pocket holes using a Kreg. For those who haven’t used one, the Kreg allows you to drill at 45 degrees so you can screw two pieces of wood to each other on the inside of the join. This adds extra strength and also a neater finish as there are now screw showing on the outer edge.
After measuring and drilling the holes with the Kreg we then went to assemble the pieces. We attached the top of the cubby to the two end pieces using clamps and our hands to hold them in place. We then attached the divider in the centre of the top. So far, so good. The drill holes lined up. The cubby ends fitted the top fairly flush.
We then come up to the trickier part, which is illustrated in the photo below: attaching the bottom of the cubby to the sides. As you will notice in the photo the bottom is suspended from the ground and rests on the divider. On the design plans this was to be 19mm. As we discovered though, one side was higher than the other and we couldn’t match it to the 19mm line. In the end we ended up getting it as close as we could and screwing those together as it wouldn’t matter to much.
This whole process was then repeated for the other side and end cubby.
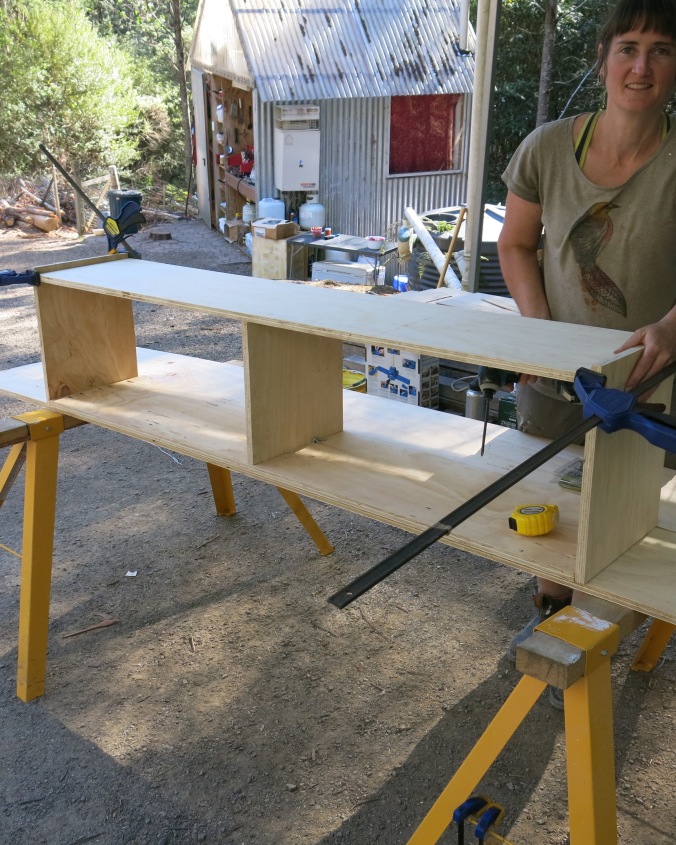
Making the cubby’s. The difficult part was lining up the bottom so it suspended. Our cutting and measuring were a little off and so the cubby’s are not as square as desired.

Testing out in situ. End and side cubby’s complete just waiting on backing.
With the side cubby’s and end cubby built it was time to add a backing and some cleats (the wood on which the bed slate sits.) The backing was made from 7mm ply cut down to 320mm and nailed into place. It was quick and easy process and gave us a sense of completion. Deirdre then used the mitre saw to cut down the bed slates.
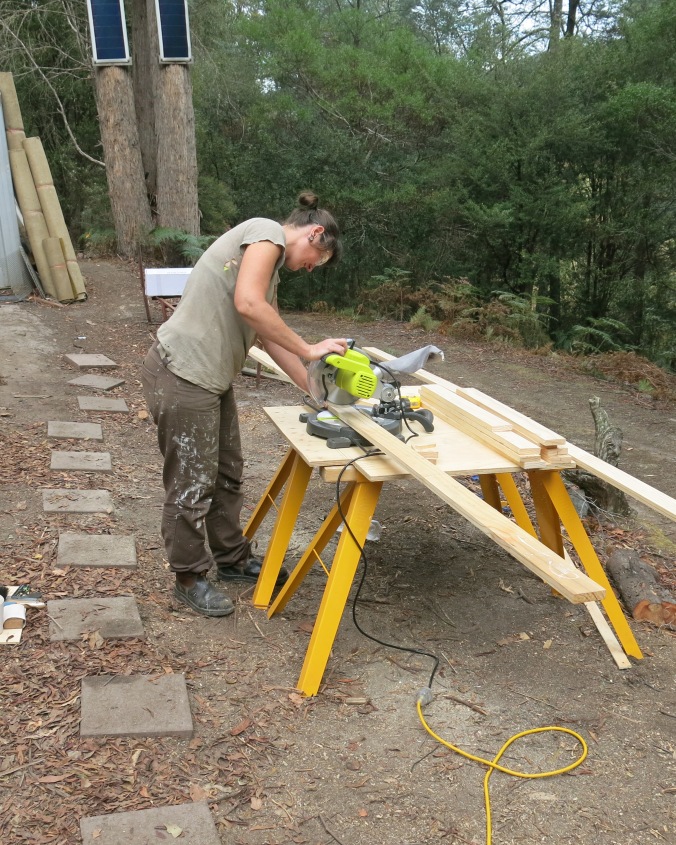
Deirde using the mitre saw to cut down the cleats and bed slates to size.
We then screwed in place the two cleats along the back of the side cubby’s ready for the slates. The cubby’s completed we then stained them with a natural clear varnish.

The cubby’s being stained with natural varnish.
The painted beds were then brought inside and the slates attached. The bed completed on Deirdre’s birthday as we had originally planned.
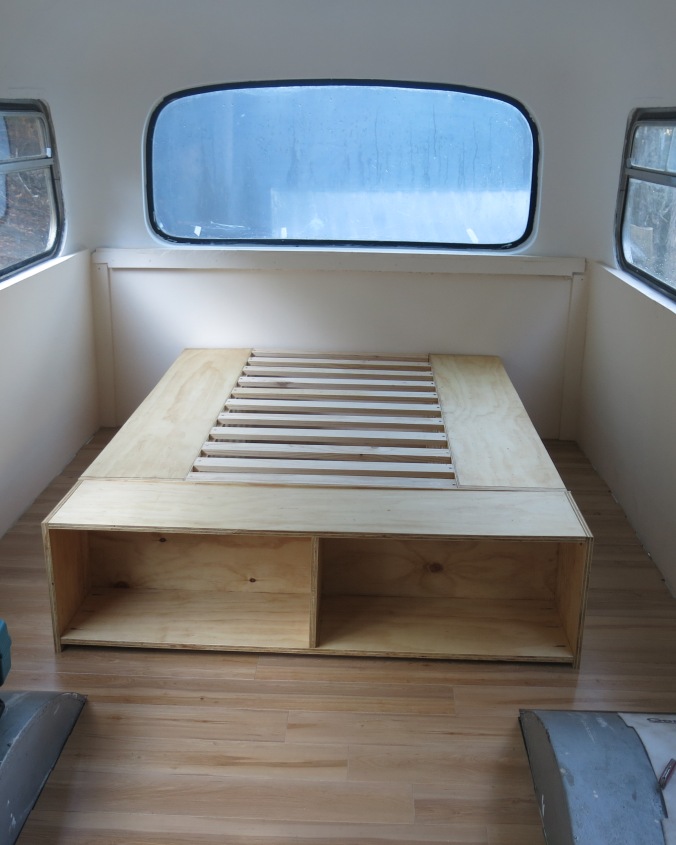
The bed in place. Completed and finished too schedule on Deirdre’s birthday.
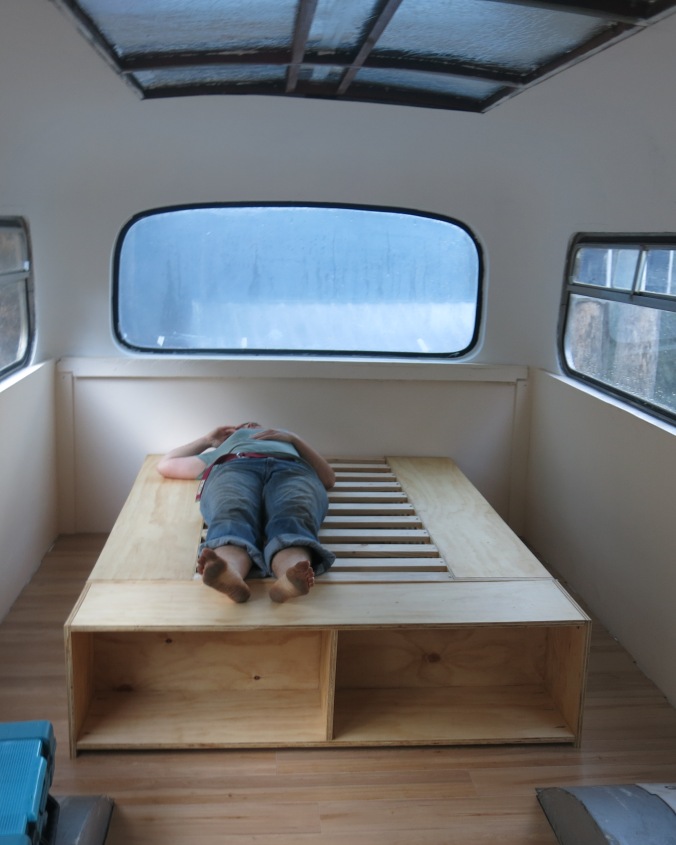
Deirdre testing out her birthday present!
Last thing to come was our bed which arrived mid Friday morning and was quickly unpacked and made ready for us to move into and enjoy.
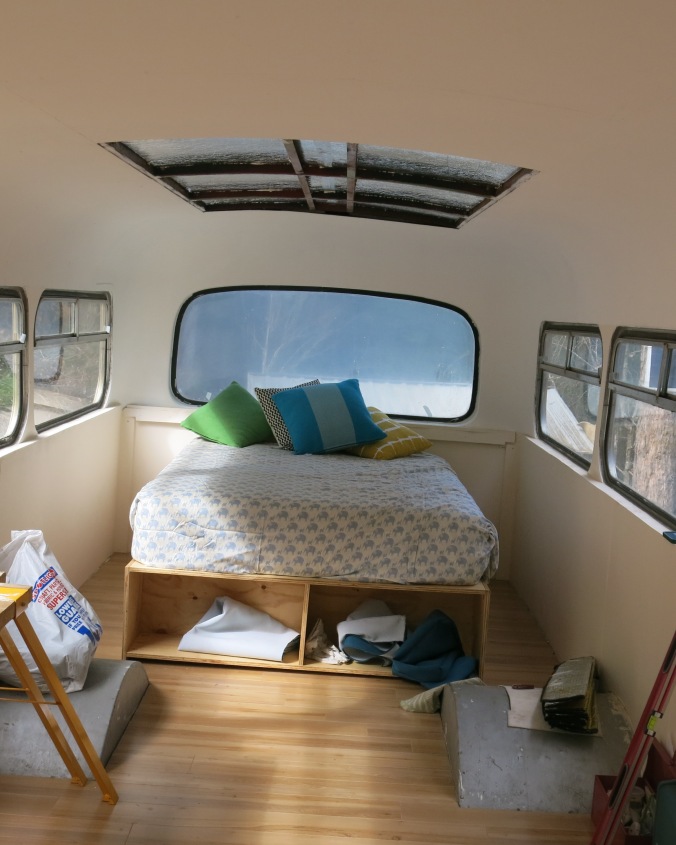
The bed complete!

OHHHHHHHHHHHHHHH a bed at last!!! maryb x
LikeLike
Well done. Congrats to you both. Somewhere nice, somewhere warm, somewhere dry, and somewhere snug ….all in time for winter.
Cheers
LikeLike
Thanks Dad. Wouldn’t have been able to do it so quickly without your help. cheers
LikeLike
Bed looks fab. Great idea. Xx
LikeLike
Thanks. we are quite happy with it ourselves.
LikeLike