So it’s been a momentous week. It’s been 3 months since we started the build and we’ve finally finished. On Monday we completed the draws to our kitchen cabinet and on Friday we had the water and gas connected to the bus. No more cooking outside! Bread, roast veggies and baking biscuits here we come. This post is a little bit of a catch up on this week. First things first…
The Kitchen Cabinet
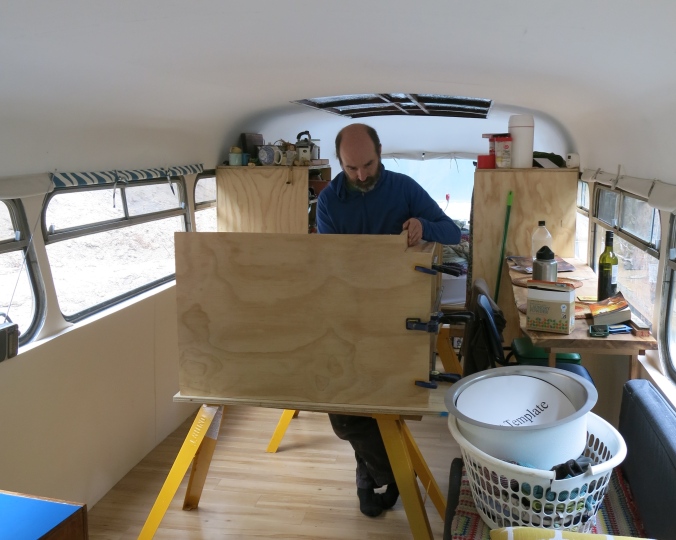
Once again we chose an Ana White design as our basis from which to work. As the plan shows the first stage was to build a base for the cabinet to sit on. As with most of furniture this was made from plywood and pine boards. Worried about the strength of the cabinets we added extra braces underneath roughly were the dividers would go. All of the pine board was pocket holed drilled together with the plywood nailed on top.

The base of the kitchen cabinet being constructed under the watchful supervision of Oscar.
After making the base we cut out the sides and dividers. Wanting height symmetry with the kitchen bar we settled on the bench coming 900 mm high. We cut the two sides to this length with the dividers in the middle being shorter (900mm- the height of the base). With the sides we also cut a small corner out, as the base was inset from the cabinet front creating a kick stand. We painted these sides and dividers and bought them inside to assemble inset, since it would be too tall to move through the door if assembled outside.
Adding the sides.

Deirdre envisioning the countertop and dividers to work out how big the drawers should be.

The dividers in place. In front you can see the wood we chose for the countertop, Tasmania Oak boards.
Once the dividers were in place we added some supports to help hold the cabinet square and also to act as supports upon which we would sit the countertop. As per Ana Whites instructions we used the offcuts from the plywood sheets we made the cupboard from. It was during this step that we stumbled upon our biggest issue with the cabinet. Yet again, it wasn’t square.
The gaps at the top of the dividers was different to the gaps at the bottom of the dividers. This meant it would be difficult to make doors as we’d planned as the doors would have to be offset. It would also create problems when we came to making shelves as each shelf would have to be different widths.
As with previous mistakes we’ve made we talked through and realised on closer inspection of the dividers the wood itself was warped and so we couldn’t really fix it. In terms of the shelves, well we would just have to tailor them to fit as we have done in most of the furniture.

Once we had the supports in place we set to making the shelves and the countertop. Deirdre took to the task of putting the countertop together. Cutting the boards to a rough length Deirdre drew a rough triangle on the back of the table and then pocket holed each of the oak boards to each other. Board by board she assembled until the four boards were put together and we had ourselves a countertop. This was stained with the same oil we had stained the countertop with.

Kitchen counter top being screwed together.
Once again we bought the countertop inside and went about assembling it together. A step that proved a little trickier than we thought. We had designed the countertop with an overhang on all four sides. As previous mentioned though the plywood bowed on the sides and in the dividers. This meant that the edges were uneven around the edges. After some measuring and finessing by Deirdre we marked out the right spot.We then flipped the top onto the ground. Turning the base over the top we lined it up and begun screwing the base to the top.

Screwing the countertop in place.
The countertop screwed in it was now time to mark out and cut the space for the sink. A scary task that we were both scarred of stuffing up, but ended up being easy, finishing in little less than half an hour. With the sink hole cut out we then went about making shelves. As the cabinet was deep Deirdre thought that the shelves should be on railings. Deirdre liked the idea of doing bakery shelves (for want of a better term-as you can see in the photo). I wasn’t too sure, but have come to see Deirdre’s wisdom and great taste(!)

Deirdre takes a jigsaw to the counter top, creating the hole for our kitchen sink.

The kitchen cabinet in place.
So that was a week or so to Monday. Kitchen cabinet built and completed. All the furniture done in just on three weeks. Next highlights were…
Water and Gas: now we are cooking!
Monday was us finishing the bus. Tuesday was the first stage of other services being connected. First off, with the tank we’d ordered in March finally being delivered. A quick and easy process and a nice site to look up at. As you can see below it’s not connected to any water so that afternoon we had some 5000L of water delivered, for the whooping price of $75. Not exactly self sufficient but with the lack of rain a great solution.

Friday saw the water and gas being connected. In preparation I spent Wednesday and Thursday creating a retaining wall along the cleared area. The original plan was to build a retaining wall, backfill this with soil and then sit the gas bottles on this. That was the plan. The more difficult plan. As the photos below show after building two walls I realised that it wasn’t going to work and therefore started again the next day. I built a retaining wall further back from the bus and created a shelf for the gas bottle to sit on.

Retaining wall mark 1

The gas bottle on shelf awaiting to be connected.
Friday morning came and the plumber arrived. After a few hours of work he connected up our tap, gas and water from the tank to the bus. We now have an almost complete home. Just waiting on the solar to be connected next week. 3 months and we are now finally cooking with gas!

Now we are cooking!

There’s nothing like having your vision realised. When we moved into Serendipity Farm we gutted the entire kitchen. We lived in a box with a hole in the floor in one of the coldest winters we had ever known (and Steve comes from the U.K.!) but we survived and once we built our cupboards, had our gas connected and got Brunhilda (4 oven wood stove with water jacket) situated and hooked up it really felt like this place was ours. You guys have performed some serious magic with your bus. I really like the bakers shelves idea. Wish we would have known about it when we were creating our rolling “island”. We didn’t want to take up too much of the space in our kitchen/dining area (small space) so we made it so that we could roll one of the islands around and have it flush against the wall if needs be. The shelf inside leaves a lot to be desired but like you, we soon worked out that wood has a mind of it’s own. We learned that the hard way when we were making a dog fence around the house block so that the dogs could run free in this area and used green pine. It was SO warped and kept warping after it was built that anyone flying over our house and looking down at how we built our fence would think that we were drunk for the duration. Earl isn’t a jumper and Bezial is old and fat and thus our drunken crazy fence does the purpose. I love what you guys are doing down there. It must be getting pretty cold as we are almost to the point of lighting Brunhilda for the duration (she is very efficient and stays alight for the entire 7 or so months of “winter” and cold weather that we get up here in the North) and we are a lot warmer than you guys are. Glad everything is in place to keep you warm and happy over what promises to be a long, frigid and very dry winter this year. Cheers for following my blog by the way 🙂
LikeLike
Thanks. Some nights have been cold but the last few days have been better and we haven’t needed the fire. Glad that you like the blog and have taken something from it. It has been rewarding to get the vision of the bus better than we thought we could. The flaws only we see too which is good to keep in mind. I’m always amazed at how things still function and work even if not to the ideal- it’s like those houses that lean for years and years without falling. The natural warp holds it in place as it is and to change it would make it worse. Will keep in mind the green pine fence- we are going to have to get onto doing fencing soonish. Thanks for following the blog too.
LikeLiked by 1 person