I’ve been reading a lot of theory around ecology and garden design lately hence the same what pretentious subheading. In delving into this world of novel ecosystems and restorative landscaping I had formulated a six part essay series looking at the multiple usages of one Eucalyptus (stringy bark) tree on our block. Starting from the leaves and canopy branches (our mulch) and moving through the thinner branches (trellises) and onto the thicker trunk (logs, fence posts, firewood).
I had it all planned in my mind but when it came to motivation to actually write it I felt that too much energy would be expended on my little thought bubble rather then focusing on the practical side to it. So I’ve shelved the theoretical exegesis and settled on a practical illustration on the ways in which we are using all the trees we have had cleared on our block. Up first a log retaining wall for our studio.
STUDIO LOG RETAINING WALL

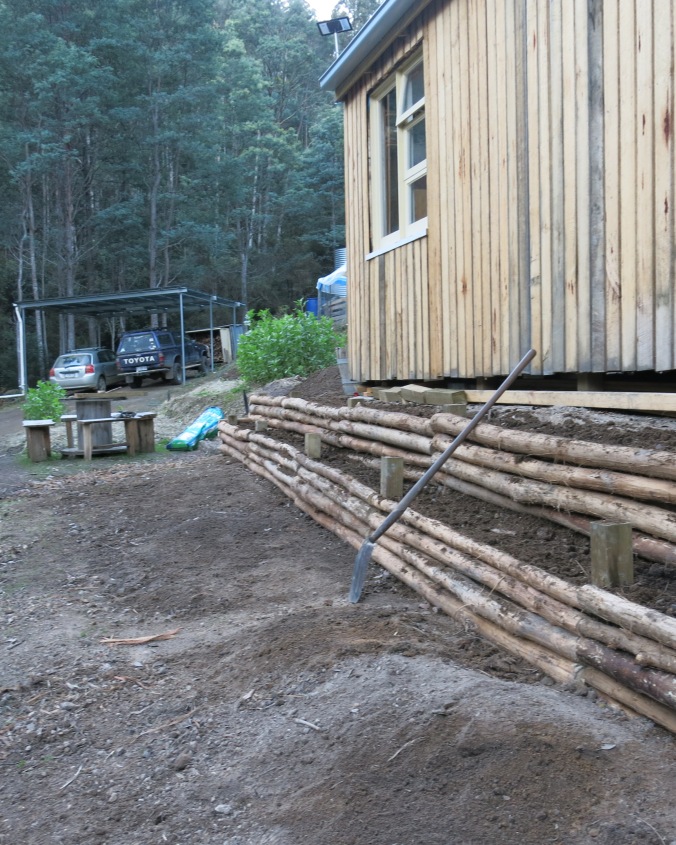
The studio with it’s retaining wall.
As many may know last November we built a little studio space on one of the terraces behind the bus. The studio was designed to be as wide as possible on the terrace. This gave us little room to walk around the side of the studio, making it difficult to work on the guttering and the like. For a while we were deciding what to do with the slope between terraces. We originally thought of just planting it out with flowers but our soil is quite nutrient poor and the act of improving the soil would potentially destabilises the building so that was out of the question.
After a few months of tossing up ideas we settled on constructing a retaining wall at two different levels. This being chosen as it meant that each of the walls was lower and therefore needed to retain less soil. Less soil meant less stress on the walls. Less stress meant instead of having to dig excessive channels for footings and sloping the water away from it we could go a more basic approach.
With the approach settled it was time to settle on the materials we would use. Having costed out the wall at around $1000 buying new timber we choose to utilise some of the trees that needed clearing for our fence line and new house site. Over the course of April and May these trees we felled and cut into rough lengths of around 2-2.5 metres. After some hours of research we decided that for pest control and longevity we would be better off debarking the logs and so with a mallet, a screwdriver and our hands we stripped log after log bare until we had a big enough pile of them to begin.
By then it was early June and the choice of doing it with our own timber whilst saving money was costing us extra in time. Fortunately though I had an unplanned week of work and so starting on that first Monday of June I got up early and started building the wall.

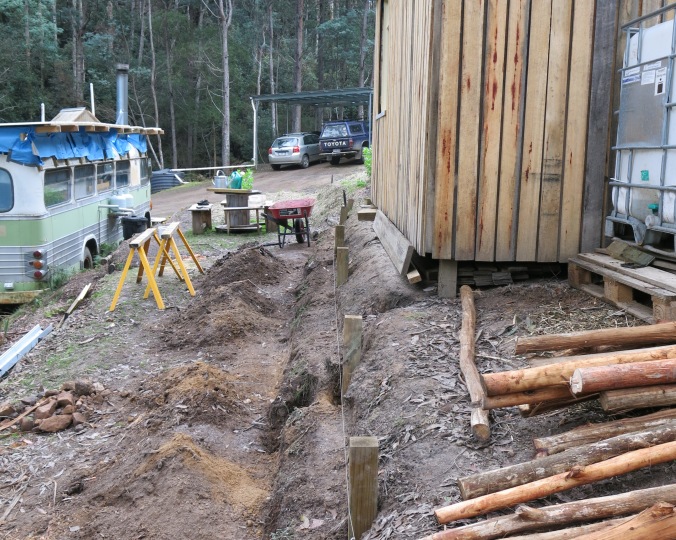
Setting the first posts. You can see the pile of bark in the background.
Having cut back a level half way up the slope I set about digging the holes for the posts. The holes were set roughly 2 metres (depending on rock or root debris) apart. Including the end posts it meant a totally of 6 holes per wall. Over the course of the first day I set to digging and setting the first row of posts for the top retaining wall.

First level down. Onto construction next.
With the first row complete it was time to set the second row of posts. Having dug all the holes this was quicker and by the middle of the second day I had all the posts in and was ready to add the logs. A task that was a little more time consuming than I had first thought. As mentioned above the logs were cut to rough lengths meaning these had to be re cut to length with the chainsaw. Not only that but I also needed to find ones with similar thickness.

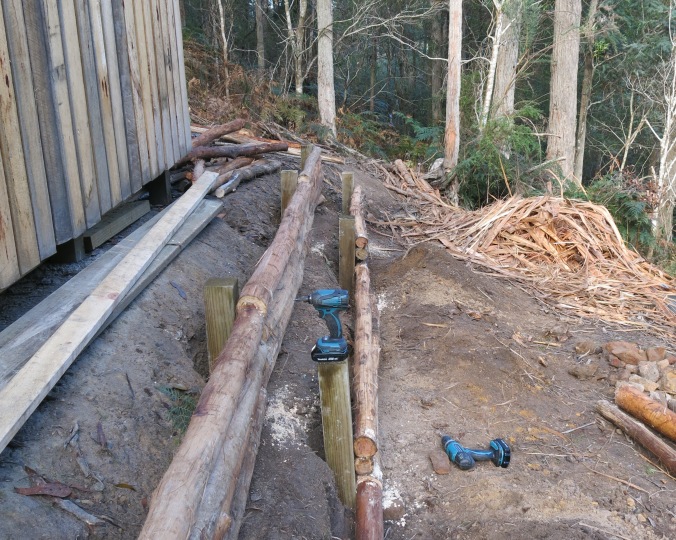
Again a different perspective. The posts are set and you get a sense of the levelling of the ground for the retaining wall.
Soon I realised that working in sections would was the best approach. So grabbing 3-4 logs at a time I would cut these to length before attaching them with screws to the post at each other. Repeat 4 more times and I soon had the first wall to a good height and was able to start on the second wall (see photo below).
As luck would have it I hadn’t cut enough trees and so half way through the second row I had to go back up to our potential fence line and clear a few more trees and set to debarking them again. A long tedious venture that took the best part out of a day out of my wall building.

A more illustrative view of the process. Tools ready and waiting for the next log.
Never the less by the end of my week off I had finished the two retaining walls and only had the ends to complete. These quickly added to one morning a week lately by utilising some of the excess lengths from the logs.

Lengths completed. Only the ends of the walls to go and it’ll be ready to backfill.
With the ends in place it was then time to line the walls with some eco-fabric and then backfill with soil, horse manure and biochar. This was a relative quick process. Rolling out the fabric I cut it in half and then stapled it to the sides of the log working my way from back to front making sure the fabric was tight and filled the gaps between the logs (see bottom photo below).

First step in the process of filling up the beds. An eco fabric to cover the gaps between the logs is measured to fit.

A more detailed view of the fabric at work.
Fabric in place it was then time to add back some of the soil I had dug out and add some of our neighbours horse poo we had just collected. Filling it up in layers and then mixing it together I also through in a handful of biochar to each bed. By the end of the day we had a couple of retaining walls filled with soil. These top up when it comes to planting out in Spring with a good layer of compost added to the growing medium.

Adding some of our neighbours horse poo to the bed.
Overall it took the best part of 5 x 6 hour days to do this myself (not to mention the hours spent getting all the materials.) It’s not the time that matters it was the joy of building it and learning the skills to fell trees accurately. Come Spring (when our fences is up) the two beds should be planted out with strawberries, nasturtiums, marigolds and other edibles. Nestled in front of it will hopefully be some plum and nacho pear trees. Our first food forest will be on it’s way and all that time spent will be more than worth it then.

Beds filled. A little tidying up of the excess soil and then it will be ready to plant with strawberries, nasturiums, marigolds and other flowers come spring.
The result using your local rough logs looks wonderful Scott.
LikeLike
Another excellent job. Is there nothing that you guys can’t do? Seriously though, I can’t wait to see how you plant it out and your food forest beginnings.
LikeLike
Question; Would the retaining logs have been better placed behind the posts for stability? Looking forward to seeing the garden grow. 🙂
LikeLiked by 1 person
Hey there guys – what’s happening at your place?
Seems like a loooooong time since you did a catchup…
Hope all is ok 🙂
LikeLike