Studio Log Retaining Wall (or on the multiple use of trees pt 1)

I’ve been reading a lot of theory around ecology and garden design lately hence the same what pretentious subheading. In delving into this world of novel ecosystems and restorative landscaping I had formulated a six part essay series looking at the multiple usages of one Eucalyptus (stringy bark) tree on our block. Starting from the leaves and canopy branches (our mulch) and moving through the thinner branches (trellises) and onto the thicker trunk (logs, fence posts, firewood).

I had it all planned in my mind but when it came to motivation to actually write it I felt that too much energy would be expended on my little thought bubble rather then focusing on the practical side to it. So I’ve shelved the theoretical exegesis and settled on a practical illustration on the ways in which we are using all the trees we have had cleared on our block. Up first a log retaining wall for our studio.

STUDIO LOG RETAINING WALL

IMG_4982

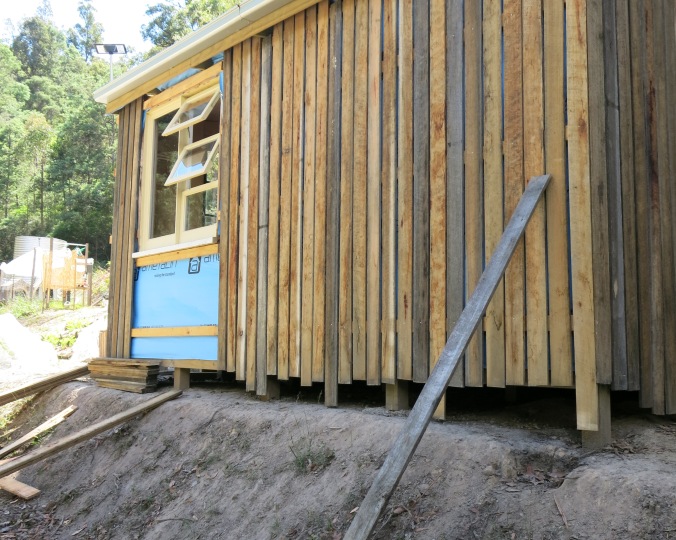
The studio with it’s retaining wall.

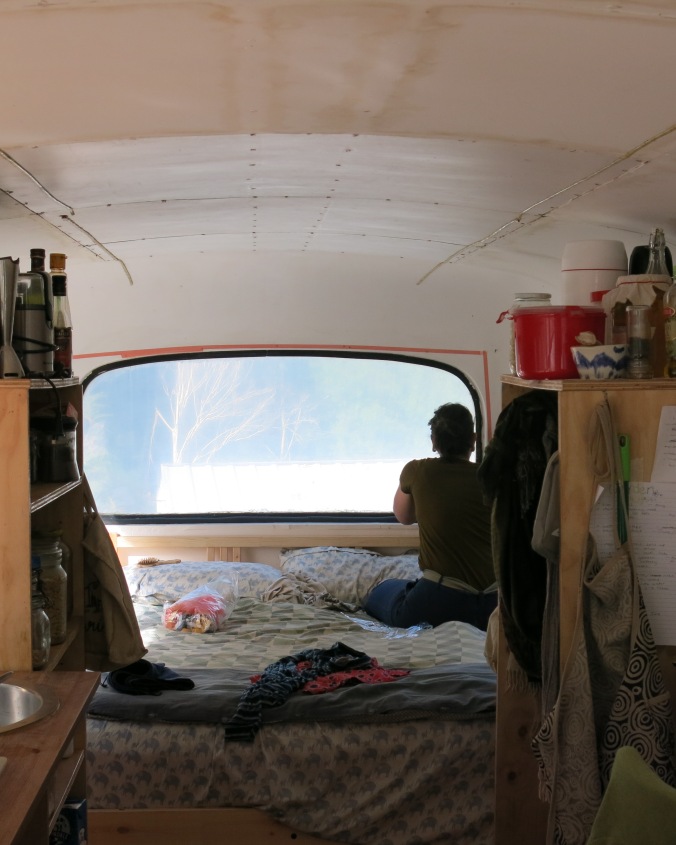
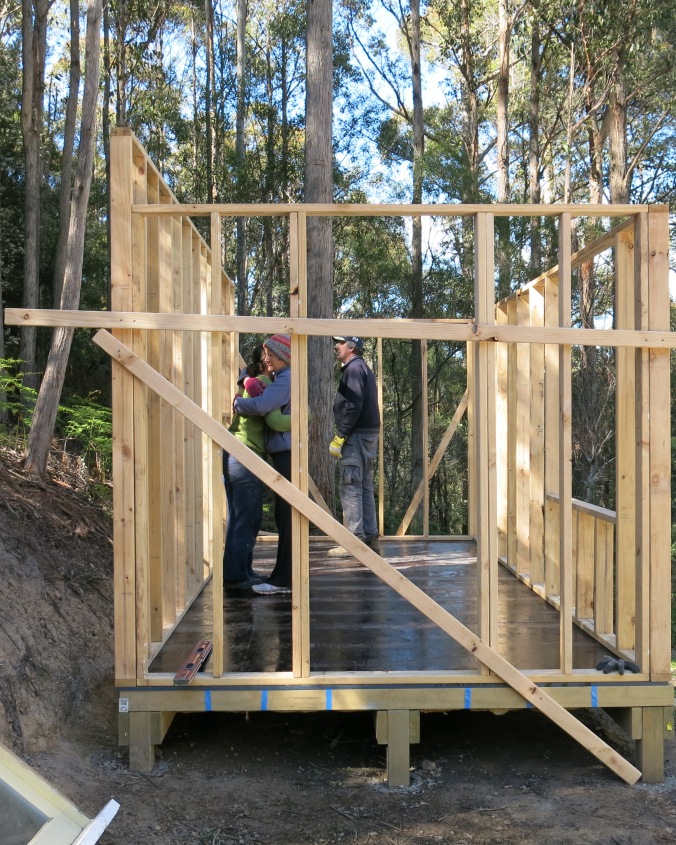
As many may know last November we built a little studio space on one of the terraces behind the bus. The studio was designed to be as wide as possible on the terrace. This gave us little room to walk around the side of the studio, making it difficult to work on the guttering and the like. For a while we were deciding what to do with the slope between terraces. We originally thought of just planting it out with flowers but our soil is quite nutrient poor and the act of improving the soil would potentially destabilises the building so that was out of the question.

After a few months of tossing up ideas we settled on constructing a retaining wall at two different levels. This being chosen as it meant that each of the walls was lower and therefore needed to retain less soil. Less soil meant less stress on the walls. Less stress meant instead of having to dig excessive channels for footings and sloping the water away from it we could go a more basic approach.

With the approach settled it was time to settle on the materials we would use. Having costed out the wall at around $1000 buying new timber we choose to utilise some of the trees that needed clearing for our fence line and new house site. Over the course of April and May these trees we felled and cut into rough lengths of around 2-2.5 metres. After some hours of research we decided that for pest control and longevity we would be better off debarking the logs and so with a mallet, a screwdriver and our hands we stripped log after log bare until we had a big enough pile of them to begin.

By then it was early June and the choice of doing it with our own timber whilst saving money was costing us extra in time. Fortunately though I had an unplanned week of work and so starting on that first Monday of June I got up early and started building the wall.

IMG_4956

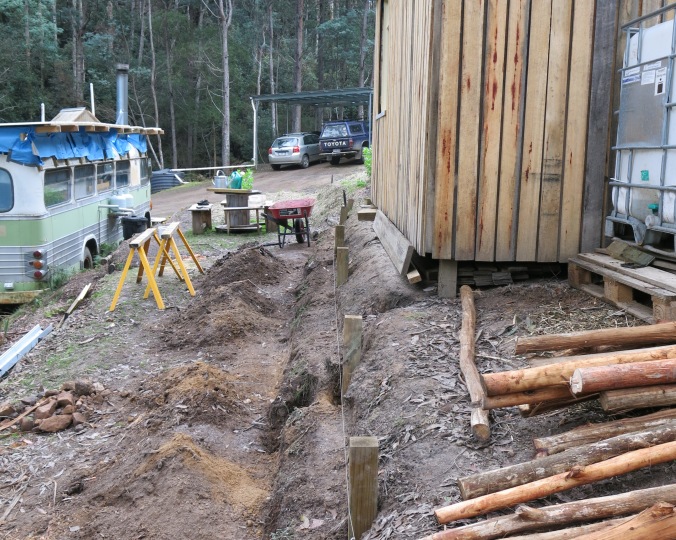
Setting the first posts. You can see the pile of bark in the background.

Having cut back a level half way up the slope I set about digging the holes for the posts. The holes were set roughly 2 metres (depending on rock or root debris) apart. Including the end posts it meant a totally of 6 holes per wall. Over the course of the first day I set to digging and setting the first row of posts for the top retaining wall.

IMG_4959

First level down. Onto construction next.

With the first row complete it was time to set the second row of posts. Having dug all the holes this was quicker and by the middle of the second day I had all the posts in and was ready to add the logs. A task that was a little more time consuming than I had first thought. As mentioned above the logs were cut to rough lengths meaning these had to be re cut to length with the chainsaw. Not only that but I also needed to find ones with similar thickness.

IMG_4964

Again a different perspective. The posts are set and you get a sense of the levelling of the ground for the retaining wall.

Soon I realised that working in sections would was the best approach. So grabbing 3-4 logs at a time I would cut these to length before attaching them with screws to the post at each other. Repeat 4 more times and I soon had the first wall to a good height and was able to start on the second wall (see photo below).

As luck would have it I hadn’t cut enough trees and so half way through the second row I had to go back up to our potential fence line and clear a few more trees and set to debarking them again. A long tedious venture that took the best part out of a day out of my wall building.

IMG_4966

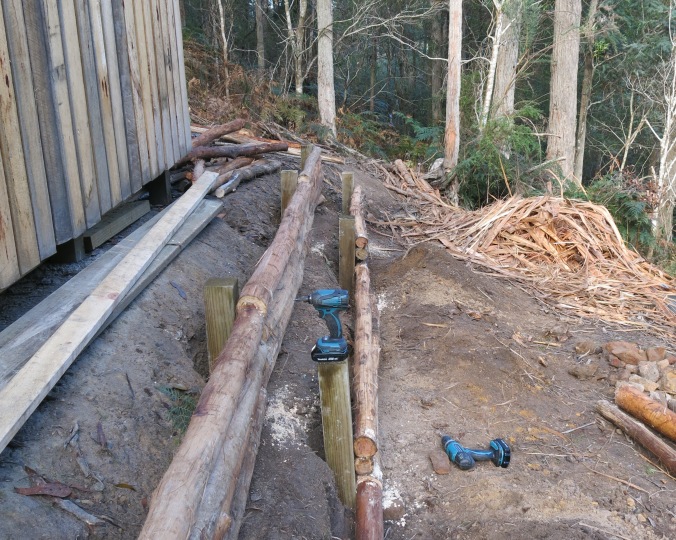
A more illustrative view of the process. Tools ready and waiting for the next log.

Never the less by the end of my week off I had finished the two retaining walls and only had the ends to complete. These quickly added to one morning a week lately by utilising some of the excess lengths from the logs.

IMG_4968

Lengths completed. Only the ends of the walls to go and it’ll be ready to backfill.

With the ends in place it was then time to line the walls with some eco-fabric and then backfill with soil, horse manure and biochar. This was a relative quick process. Rolling out the fabric I cut it in half and then stapled it to the sides of the log working my way from back to front making sure the fabric was tight and filled the gaps between the logs (see bottom photo below).

IMG_4971

First step in the process of filling up the beds. An eco fabric to cover the gaps between the logs is measured to fit.

IMG_4973

A more detailed view of the fabric at work.

Fabric in place it was then time to add back some of the soil I had dug out and add some of our neighbours horse poo we had just collected. Filling it up in layers and then mixing it together I also through in a handful of biochar to each bed. By the end of the day we had a couple of retaining walls filled with soil. These top up when it comes to planting out in Spring with a good layer of compost added to the growing medium.

IMG_4980

Adding some of our neighbours horse poo to the bed.

Overall it took the best part of 5 x 6 hour days to do this myself (not to mention the hours spent getting all the materials.) It’s not the time that matters it was the joy of building it and learning the skills to fell trees accurately. Come Spring (when our fences is up) the two beds should be planted out with strawberries, nasturtiums, marigolds and other edibles. Nestled in front of it will hopefully be some plum and nacho pear trees. Our first food forest will be on it’s way and all that time spent will be more than worth it then.

IMG_4985

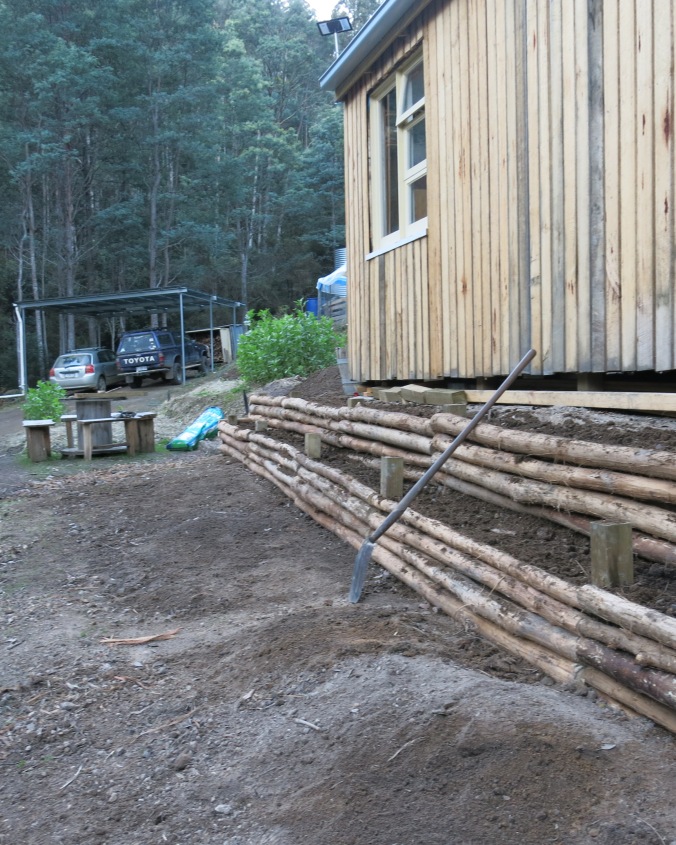
Beds filled. A little tidying up of the excess soil and then it will be ready to plant with strawberries, nasturiums, marigolds and other flowers come spring.


Water storage part 1: studio tank

It’s been a while between post. A warmer start to winter has meant more time outside working in the garden. This is great for progress (and our general health) but has me feeling a little guilt about neglecting this online patch. With the colder weather having arrived this week (and a couple of big projects completed/underway) my mind has shifted back to the blog.  So here’s the first of a few posts over the next week or so. This ones a shorter one on our first water storage set up. Enjoy!

STUDIO TANK

It’s strange to say it but the hardest part of our studio tank was working out what to use. For weeks over summer and autumn we ummmmed and ahhhed about what we should do. Should we buy one new at 500-1000 per tank? Buy a old one? Set up a series of drums? Through our research we had found a guy in town who sold a IBC (1000l water cube.) This seemed the option but was difficult to get out to our block.

We then remembered that we new a guy who worked at the local cidery. We asked him if they had any old ones and later on that week a ute was driving up the driveway with an old IBC that was about to be thrown out (Thanks R!). We lifted up the ute and walked it around the back of the studio were it sat for a week or two whilst we worked out the tank stand design.

IMG_4952

Empty tank in place awaiting the guttering.

As you can see from above we went with that versatile diy building material known as a pallet for our stand. Two of them in fact. Side by side. This left of with ample room to store our watering cans and connect our hose come summer when the studio retaining wall garden is cranking.

The tank in place it was then time for guttering the guttering. First point of call: a clean to ensure good flow. Over the course of the morning one and then both of us clambered up onto the roof and after cleaning the sticks and whatnot installed a gutter guard to filter the debris that falls.

IMG_4954

Deirdre utilising the time on the roof to clean the gutter and install the gutter guards.

The gutter guard installed we then moved onto the downpipes. This was fiddly work. For all the skills we have learnt we still have yet to perfect cutting a downpipes evenly. We always end up with one side longer then the other. Normally this is not to big a deal as the pipe just goes straight. This time it was different. As the photo shows we needed the guttering to go down, around the corner, across the back wall and the shot out to the tank inlet.

Multiple parts; multiple cuts. Multiple mistakes; multiple rivets. Eventually we managed to get a few sections together and small chunks at a time we attached the downpipes together and by the end of the afternoon we had a downpipe and tank complete. The only thing left then was for it to rain and we could see how good our systems was.

IMG_4957

A strangely angled photo of the guttering and tank completed.

Three weeks later it did and we finally had ourselves a working tank. Our first water storage was complete and we slowly getting ready for a potentially dry summer.

IMG_4960

It works! 3 weeks after installation and we finally get our first winter rain.

Winterproofing pt 3: ‘double glazing’

This is the third and final post in the winter proofing series. The first two focused on the bus roof. This time we shift the focus back into the bus and look at our attempt at ‘double glazing’ the windows. The photos below are mixture of the process but give an idea of what we did. In reality we added some plastic to the windows. A side not when we check out the block in 2015 the previous owners mentioned covering the windows with bubble wrap in winter.

For aesthetic reasons we chose a slightly different option instead purchasing some heat shrink plastic through a company in Melbourne. A more expensive option then bubble wrap but worth it we feel. And to be honest not that expensive. All up the double sided tape and plastic for all 13 windows of the bus cost us around $250.

IMG_4923

Deirdre attaching the double sided tape around the back window.


IMG_4888

Cutting back the window to size. You will notice that on the aluminium window edge is a rubber tubing. Our rationale for this being that the rubber will insulate the window frame and stop any cold air and condensation building up between the window and the double glazing.

IMG_4924

The front window after being blow dried. 


IMG_4926

Looking out of the lounge window. 

So that’s a quick photo overview of the process. Of all the windows on the bus the front was the hardest to do as these had no real window sill. Therefore there was less room to creating the insulation and air gap that is needed to double glaze. The windows probably could be pretty and it’ll be interesting to see how it handles the middle of winter but so far we haven’t had to wipe down the windows much and we’ve yet to have any mould. Hopefully it stays that way.

Winter proofing the bus Pt 2: the roof.

Winter proofing pt 2: THE ROOF

IMG_4912

The bare frame.

So it’s the second of the post on winter proofing the bus. This time the focus is on the roof. The host so to speak for the bus. As alluded to in the previous post we had spent the months of February and March getting the frame ready for the roof. In our usual way we have managed to miss documenting the whole process and so you will have to contend with the above photo of the completed frame. Don’t worry we were better documenting the next stages so you can see a step by step process of our the roof was constructed.

DAY 1

IMG_4914

First pieces of sarking are up and the roofing tin is ready to lift up.

The purpose of the roof was two fold. First it would add extra protection to stop the odd leak we were getting last winter. Second, and more importantly, it was a cover for the insulation that would hopefully create a barrier between the cold external frame and the warm interior of the bus. This would eliminate the condensation on the roof and frame and hopefully eliminate the mould and mildew we experienced last winter.

To achieve this the plan was simple. Layer the top of the bus with Earth Wool Batts, cover  it with sarking and add the roofing tin over it to protect it all. The most difficult aspect of it all being that we had to do it section by section has we couldn’t stand onto of the insulation to add the tin.

IMG_4917

Screwing down the first of the pieces of tin.

With Deirdre on the ground and myself on the roof  we had a system in place. The insulation would be cut to length on the ground and then passed up to me. I would roll it out and then I would cut and staple down the sarking before Deirdre passed the tin up to me. I would lay out the tin and when we were happy that it lined up with the other pieces then it would be screwed down in the corners.

This process was then repeated with the next section. As with all systems it took a while to get the processes in place but by It took a while to get going but once the system was down we were able to make good progress and by the end of the first day (Good Friday) we had 4 sheets up and a third of the roof completed.

IMG_4915

The roof at the end of day 1. A third of the way, more to go.

DAY 2

Easter Saturday. We woke and got started early. The aim was to get the rest of the roof up today. We followed the same process as outlined above except the tin didn’t line up how we wanted and a good hour was spent trying to line it up perfect. (A difficult task when shortcuts have been taking with your roofing battens and they are not on straight.) Eventually we settled for near enough is good enough.

IMG_4918

Lunchtime day 2. Trying to lay the shorter pieces out. A trickier task then need be when your perfectionist streak kicks in!


Once that decision had been made the roofing flowed fairly quickly and we were both delighted to find that the allowance we had made for our solar powered kitchen fan (see photo below) worked easily.

IMG_4920

Creating an opening in the roofing to allow sun to get to our solar kitchen fan.

All of which meant by mid afternoon the tin was up and it was time to go back and fill in the gaps with the roofing task. A task that was completed by early evening. Leaving us the rest of the weekend to turn our focus towards the final winter proofing task: ‘double glazing’ the windows.

IMG_4922

The view from the house pad with the roof all up and ready for the last little bit of screwing to occur.

Winter proofing the bus: roof frame and awning

It’s been a while between post. March has been a busy month with visits from family and a trip to Adelaide thrown in. We’ve been plugging away on the block preparing for winter. For those who’ve been following the blog for a while you will know that we had a big issue with condensation last winter. Over the course of spring and summer we’ve been working out ways to alleviate this problem.

After catching up friends one day they mentioned a bendy bus in Launceston. In it we found a photo of a roof that they had added to their bus to protect the roof from the rain. We figured that we could give it a go and got onto designing a similar roof, with a few alterations, for our bus.

The alteration being where the bendy bus roof curved ours would be straight with the water running down to the passenger side of the bus. The other major alteration would be that our roof would have added insulation creating a thermal break between the cold outside air and the steel frame.

What follows over the next few posts will be our attempts to winter proof our bus. Will it work? Theoretically we are confident but until we get those below zero nights in July then we won’t be entirely sure. Until then though the first of the winterproofing posts: awning and roof frame.

AWNING IMG_4910

When we started the deck last winter we had always intended to complete an awning for it. Creating a dry space for us to enter the bus and somewhere for a fridge to be located. With the days and nights cooler the fridge is being pushed back to spring. The awning though has finally been completed.

As the below drawing shows the plan was for the awning to slightly overhang the deck. Creating a drip line away from the steps and deck so we could still move on that without getting wet. A gutter would be added to run the water down into a rain barrel or two.

IMG_2675

Over the course of a few weekends in February and March we tackled the rafters, battens and laserlight roofing. Following the same approach as for the studio (add link) we measured and cut the rafters to size, cutting notches into the rafters so they would sit neatly on the beams. These rafters were placed at 1200 intervals creating a total of 5 rafters. Each rafter was then skewed nailed onto the roofing beams.


Atop of the rafters we attached 3 rows of battens: one at the bus end; one in the middle and one above the posts. Battens on we then added the laserlight. With the awning being only 1.5 metres wide and the sheets being 1.8 metres long this meant some cutting would be required. Having struggled to cut the roofing tine for the studio side with ti snips we searched online and found a video of how to angled grind the sheets creating a straight line with clamps and a piece of timber. Following the instructions we had a go at doing this.

IMG_4906

Cutting the laser light. No sparks as the plastic melts rather than flys off.

The plastic cut easily enough. However my handy work was a little bit wonky and the line wasn’t as straight has it could have been. Not to worry though, the roofing tin for the rest of the bus would be overlapping the awning. Making sure the sheets were right way up (for sun and aesthetic purposes) the sheets were then laid out and attached to the battens creating the covered awning we had desired.

IMG_4908

Deirdre being artistic as I screw on the laser light.

ROOF FRAME Part 1

As mentioned above the roofing tin will overlap the bus awning. This meant that not only did the awning have to be added on before the roof tin but that the roof frame had to be completed before the laser light could be attached. Again I turned the computer to design a plan from which we could order the wood.

After some preliminary work it become apparently that we were designing three roofs: the front section; the middle section (that meet and merged into the awning); and the back of the bus section. To make the design cheaper it was decided that the front and back sectors of the roof need to overhang enough to keep the water off the windows. This  meant that these sectors would extend shorter.

With that decided we set to the more difficult task of working out the uprights. We did this by running a rafter from the awning across to the side of the bus. This rafter was moved up until we had the right height for the rafter to sit on. We marked this on the upright. This was the first step.

As you can see in the photo below on the uprights there is a beam. To get the precise height of the upright we needed to subtract the height of the beam from our preliminary measurement. This gave us the upright height. Next we needed to work out the angle on the upright in order for the rafter to sit neatly. Using a trick that Deirdre Dad had shown her we were able to square off the upright in order to get a flat surface to attach the beam too.

IMG_4895

Attaching the uprights.

The uprights completed we then got to attaching the rafters. We started in the centre were the awning and roof would meet. This was the most important section and needed to be completed first in order to finish the awning. Boxing out the area around the awning we then attached the rafters. These were 2.4 metre lengths of pine framing timber. Again these were skewed nailed into place.

IMG_4897

Testing out the rafters to work out the lengths.

With the centre of the roof worked out we then moved onto completing the rest of the roof. Again a similar process. Attaching the rafters across the uprights, skew nailing those in place and then adding the battens atop of this. The plan is to complete the roof over Easter (weather permitting of course). Hopefully we can get it down and then settle in for winter and start our plans for the garden and grounds.


Studio 5: the cladding

January was a busy month for us. Along with catching up with friends we also finished off the last major work on the studio (former yoga studio): the cladding. We choose wood on 3 sides and tin on one. The tin side had been already been put up in November when my sister and partner were down.Tin being selected on that side has it was taller and harder to work in with wood.The wood sides- the west, front and back- were clad in fencing palings from down the road. The process took a while to work out but once started flowed fairly easily. For anyone who has made a paled fence then you would know the process. One layer of wood with a gap and an overlay layer filling in the gap.

What follows is a photo essay demonstrating the cladding process.

img_4849

Deirdre working on the first layer of the west side. The hardest side to work on owing to the height issue. We worked top to bottom. I held the wood at the ground whilst Deirdre nailed the top in and then she held it in place whilst I nailed the bottom. We used 50mm galvanised flat headed nails for the bottom layer. With the wood being so hard we found that drilling these first helped greatly.

img_4854

The west wall almost complete just waiting for the cladding to be done under the window. The wood piled under would later go up and cover this area.

img_4855

Cladding the front. We learnt the lesson from the side and pre cut the front to the same height. This created a straight line from which we could work out the extra lengths needed for the triangle up the top. Inside Deirdre is busy sewing a dress.

img_4857

Measuring the levelness of the second layer at the back. The back was our ‘experimental side’ the area in which we worked out the correct process and could safely make mistakes as it wasn’t on prominent display. This second layer went up a lot quicker then the first.

img_4859

Whilst Deirdre was at work I set about creating some steps as an entrance to the studio. Here I have cut the left over fence posts to size and braced them straight ready to be cladded.

img_4860

The steps completed. I used the same cladding as for the studio to give continuity between the two designs. It took half a day to create but was satisfying work.

img_4861

Another angle of the studio and steps with the final cladding ready to be put up.

img_4870

Cladding completed and ready for use.

img_4872

The studio in context. If you look closely in the front you can see an outdoor kitchen set that we designed. Now for the wine barrel beds and some grass out the front of the studio.

Toilet, grey water: updates and overhauls

It’s been a busy start to the year catching up with friends- old and new- and getting back into the swing of work. I’d originally planned a post on what we have learnt in the past year but with a month already gone since our first Tassie anniversary it seems to late for that. Instead I’ve chosen to write about some of the system alterations and improvements we have been busy with (aside from finishing off the studio.) So here goes; first

The toilet

Out of all the systems (and structures) on the block the one that has given us the most problem is the toilet. From the simple fact that we had to empty out the shit everything 3 weeks to the old tree solar system that we didn’t quite understand how it works there’s been constant problems with this system. In December when the toilet again overflowed spilling sludgy liquid on the floor- for the 3rd time in a week- we said enough was enough and set about redesigning this system.

The first point of call was to do some research. As followers of milkwoods blog we remembered their post on their composting toilet and used that as the basis for our new design. In essence this meant creating a wheelie bin toilet. To do this we needed to create two things: the bin and the toilet chamber.

  1. The bin

img_4846

We stuck pretty much to the composting toilet from Milkwood for this so i’ll be short on the detail as it’s been covered there and you should look at the link closely if you are going to do it yourself.

For our version of it we drilled a small hole in the bottom corner to put the overflow piece in. We then cut an old bread crate down to size which was placed on the bottom of the bin to allow the liquid to drain through. Added to this was a piece of ag pipe to help aerate the humanure as it’s sits in the bin. We then cut a hole in the lid upon which we attached a chimney flue to. The bin was then wheeled into place under the floor ready for the chamber to be connected to it.

2. The chamber

img_4848

Whilst Deirdre worked on the bin. I got to work on the seat. We were fortunate to have some old bits of wood left in the carport by the previous owners. Wanting to get them out of the way these were cut down to size. This panels were then cut down to 600mm lengths. These were bolted to four posts to create a box that was 600 by 600 at a height of 450. The box was then painted and moved into the spot.

After drilling from below to find the correct spot we drilled a hole in the floor and cut the circle out ready for the flue to be inserted into the bin. Once we had got the flue and bin in place we then boarded up the top of the chamber and then cut out a hole in that in order for the seat to be attached. We then tested the ability to pull out the flue and once happy with that we attached the toilet seat to the chamber and now had a new toilet. One which we no longer needed to empty every 2-3 weeks.

img_4847


Grey water take 2

img_4887

This has been a long time in the making. As a previous post set out we had a rudimentary grease trap that the water then run through a pipe into the ground. In October when Deirdre’s parents were here her and her Mum, Mary, set about improving this. Before Deirdre’s Mum had arrived she had done some research online and found this American video on a bathtub grey water system. This became the model for our addition to our grey water system.

  1. Baffles in the bath

The first point was to add some baffles to the grey water. This was made from pond liner attached to the bath tub by water proof tape. The purpose of these baffles is to allow the water to slow as it travels through (see photos below).

  2.  Scoria added

We added scoria as the growing medium as it would hold any excess grease from the grease trap and also provide a good medium for the plants to grow in as the rocks are bigger than the 7mm gravel we had on site.

3. In flow and Overflow pipe.

Before topping up the bathtubs an inlet and outlet (overflow) pipe were attached to the bath. These were tank outlet valves that had been drilled into the fibre glass tub with a hole saw and siliconed to stop the water flowing back out of them. The outlet pipe was cut at a higher height to the inlet pipe meaning that the water could pool a little before flowing out.

  4.  Planting out

Using a combination of bull rushes and sedges (some bought, others relocated from our place) we planted out the bed with around a dozen plants.

  5. Second bed 

Originally we had been catching the excess water in a watering can and using this on the grass seeds out the front. As the water pooled we noticed a smell and realised that the water was still quite grey so we decided to add a second bed. (Online research spoke of this but we had originally though better.) At first this was created as a pond and we purchased aerators and pond plants for it. This last less than a fortnight before we realised we had a blackwater pond and that we would be better off creating a second bed. So we did (minus the baffles) and we now have an operational two bed grey water system.

Next time: Studio 5: Cladding. (The Yoga has been dropped from the title.)

Yoga Studio 4: Interior

It’s been a while between posts. A family wedding in Victoria, Xmas, New Years and celebrating a year in Tassie has taken up a bit of time of late. Before, some more reflective posts on what did and didn’t work in 2016, I thought it would be time to get up to step with the yoga studio. So without further ado yoga studio part 4: the interior (yes there will be a part 5 too!)

Yoga Studio 4: Interior

So when last here it was early November and the studio was water tight. With us both working things slow down a little over that month. We still worked away on the studio with a spent  insulating the wall and roof in preparation for the next big job: the wall panels and roof. A task that we had planned to be tackled when my sister Mandy and her partner Jon came to visit at the end of the month.

Installing the wall

First point of attack was the wall. We had pre-ordered some 12mm interior plywood as our wall and roof panels. The wood came in 2400 x 1200 sheets. With the eastern at 2400 high the sheets were perfect to fit for that side and so we started there working our way from the window to the door.

We put up the first piece and made it, what we thought was straight, and screwed in the four corners (a precautionary trick in case we needed to re-adjust.) We put up the second piece and realised that the uprights weren’t perfectly straight and there was a slight raise of a millimetre or two in the floor. Not much of a difference, but enough to prevent the corner of the wall from sliding into it’s correct place.

After an hour of sanding back, cutting, taking and putting up the sheet of ply we managed to get the second piece in place and were then ready to tackle the rest of the wall.

img_4827

The first wall completed.

With the first wall in it was time to tackle the second wall, the western wall. Again we worked back from the window trying to minimise the cuts to the wood as we went. Slowly but surely we put up the second wall- leaving the section under the window for last- and then set to the front and the back walls.

This was a little tricker as we needed to get the angle right.For the back wall we knew that two boards were need so we measured the height at the start and end of each board and drew a diagonal line across the. I then cut the board with the circular saw and then we tried them in place. The board fitted well. The process was followed for the second board and we had our third wall up.

Then it was time for the front. The same process was followed as for the back wall, although with the gap for the door this meant a second cut for length as well. We then filled out around the windows and over the doors. Two days of work and we had the walls internally clad.

img_4825

Jon and Mandy busy working on the western wall.

The roof

Walls up we begun the next day attacking the roof. We’d prepped the roof by adding some extra beams as support to nail into. With these beams in place it meant that all we had to do was lift up the wood into place- making sure to line up one side with the wall- and then drill them into place. Easy right?

Well yes and no. We decided to start at the high end. We measured and cut and then using a combination of Jon’s height and Mandy on a ladder we were able to get the first piece in place. Only to find out that the measurements were wrong and that in needed to be in a different place.

After sorting this out we got back on the ladder and lifted the board in place. Screwing into the corners and then the side until it was supporting itself. We then worked through the same process for the other three pieces, slotting them into the gap left, lining up the edges and screwing them in place. As the photo below shows some of them needed some fine tuning with the sandpaper but by early afternoon we had it finished.

img_4829

Team Canada fine tuning the roof panel for a nice tight fit.

Desk and Book Shelf

The interior walls and panelling done it was time to finish off the studio with some flooring, a desk and shelves. The flooring we went for was the same floating floorboards we had used in the bus. Over the course of a day we had the floor in and completed. Next we moved onto the desk.

For this we used some 1800 by 600 wide pine boards as the top. Utilising some of the storage boxes we had had from our old bed (the custom bed we built had become a spot for damp air to collect and was recently replaced by an ikea bed) as legs we soon had an L shape desk along the back wall. Above this some smaller panels of pine were turned into shelves to cover the back wall. The studio was now pretty much complete on the inside and ready for part 5: cladding.

img_4831

Floor, shelves and desk in. Completed and ready for a chair.

img_4832

Looking out to the garden. Some work is still need on cornices and moulding but the room is up and ready.

Yoga studio Part 3: roof and lock up

By Saturday we had the frame up and in place. We took the rest of the day off- so Deirdre could take Mary to the airport- and sat back ready to get back into things on Sunday. Sunday saw a change of work crew too as I had a job to apply for so Deirdre took over my spot and started on working on the rafters with her Dad.

  1. The rafters 

From the vantage point of the bus this looked to be a harder task then the frame. Whereas the frame was nailed into each here the rafters were sitting on the top plate of the frame. The first task was to cut to the treated pine boards into the desired length of our roofing tin. Our boards were 3000, our roofing tin was 2700. Hugh and Deirdre chopped off the excess length and then got out to stage 2: working out the angle for the rafters sit flush.

To do this a board was lifted into place and then marked out where a indent needed to be created for the rafter to sit flush. From this a template was created and then each board was cut to this template. As it was discovered though the template was difficult to transfer across from and Deirdre and Hugh spent a lot of time fine tuning the boards in order to get them into place.

img_4806

Deirdre and Hugh working on the rafters.

2. Adding sarking and battens

The rafters on it was then time to begin waterproofing the studio. To do this we used roof sarking, stretching it across the length of the studio. The three of us- Hugh, Deirdre and myself- worked together rolling it out, attaching it to a rafter and then holding it down with some 70mm lengths of pine so they wouldn’t blow away overnight.

img_4808

The end of a days work. Rafters on and first bit of sarking up.

Once the sarking and battens had been roughly put in place it was then time for someone to get on the roof and hammer the battens to the rafters. I volunteered thinking I would be comfortable up there. I wasn’t (it felt like I was going to fall through the sarking into the studio) but I managed to get the battens up and in place.

img_4809

Hugh making sure the sarking-sinsulation- is right.

3. Windows in

Once the roof sarking was on and the structure water tight it was time to put in the windows. This was a little awkward due to the narrow walkways around the sides of the yoga studio but with some extra fiddling around- taking off some of the support beams- we were able to squeeze the windows in place with relative ease.

4.  Roof on

The windows in it was time to get the ladder back out and begin putting the sheets of zinc on the roof. I again volunteered to get up on the roof. One by one Hugh and Deirdre passed the roofing sheets up to me. Making sure to line them up evenly at the guttering ends we held the sheets in place with some timber and then I set to screwing the roof in place.

img_4811

Sunny work. Laying out the roof ready

5. Final lock up: Water proofing and door

Once the roof was up it was time to water proof the yoga studio and add the door. This task was left to Deirdre and Hugh as I had work. From all accounts it went quite smoothly with the door fitting perfectly into the frame and the parking holding. coming home from work it was great to see a finished lock up stage of the build. In a week we had gone from footings and floor to a fully framed water tight yoga studio.

img_4813

Tired and happy studio crew

Yoga studio part 2: frame up

It’s been a busy few weeks here on the block. At the end of October Deirdre’s Mum, Mary, and Dad, Hugh, came down for a weeks visit to help with the construction of the yoga studio. In the lead up to the visit Deirdre and I set expectations to get the frame up by the end of the week. As this post shows we were well off. The four walls were up by the Saturday and by the end of the week we had the yoga studio water tight. This post focuses on the frame; the next on the roof.

  1. Revising the plan

As the previous post showed we spent a lot of time planning and ordering timber for the frame. When it come to building the frame we thought we were set. We weren’t though. Have talking to Hugh we realised that our uprights for the frame were too far apart. This was easily remedied by adding in some more uprights. It would mean more wood but for the strength of the structure it would be worth it. With the new design set we begun the construction.

2.  Setting the frame

We chose to construct the west frame first as this would fit snugly on the floor footing when constructing it. To begin by marking a rectangle with the top and bottom and two sizes, as you can see Mary and Hugh. With the outer rectangle created it was then time to add the joists and window (more on this below in point 3). After much discussion we set gaps of 390-400mm.

This same process was taken for each of the wall. The outer frame built, any window or door set and then joists added at the desired gap. Each wall was constructed on the floor and then moved aside when finished so we could work on the next wall.

img_4784

Hugh and Mary working on the corners of the first frame.

img_4790

The first frame built and resting on the ground waiting to put up.

3.    Setting the Windows and Door

This was relatively easy step. The process was to decide the placement of the window or door and lay this on the floor inside the frame (you can see this in the photo below). We would then construct the support frame around this. The window would then be removed from the frame leaving a space for the windows and door to be inserted when the frame was up in place.

In the case of the windows we also added some extra support on the side of the window. This acted as point ti attach the window to the frame but also a result of the fact that our second hand windows had a overhanging top and bottom bases that needed filling out.

img_4797

Framing the front. The door was put in place and the frame built around it. A similar process was used for the windows on the East and West side of the building

img_4800

Testing the door. The last of the frames is now complete.

4.  Putting the frame up

So the four walls were constructed on the Thursday and Friday. Come Saturday morning we were ready to put the four walls up and attach them to each other. We begun with the East Side, the tallest and heaviest frame. This was lifted up onto the frame and then slid across into place. When it was plumb we added some braces at both ends to hold it whilst we worked on the other three sides.

The same process was followed for three shorter walls. With each wall being added and made plumb with the previous wall. With the four walls up and braced we then attached the walls to floor, screwing them down in place and screwing them to each other.

img_4802

Putting the first of the wall frames in place. Deirdre and her Mum doing the hard work.

img_4803

A moment of celebration! All 4 walls fit in place and stand  with bracing.

img_4804

A happy framing crew at the end of 3 days building.

In 45 minutes of work we managed to get the frame up and braced and supporting itself independently. In a little over two days we had built a frame. With that down it was time for the roof and to put the windows in.